How to Remove Swirl Marks From Car Paint
You wash the car, dry it off, park it in the sun, and there they are: those fine, spider-web scratches that wrap around every reflection and turn your clear coat into a cheap hologram. Swirl marks are the single most common paint defect we see come through the shop here in Kissimmee, and they're also the most fixable. The catch? Almost everything sold as a "swirl remover" in a bottle is hiding the problem, not solving it.
This guide walks you through how to remove swirl marks from car paint the correct, permanent way. We'll cover what actually causes swirls, how to tell them apart from holograms and deeper scratches (RIDS), why a machine polisher is the real fix, and how to do it safely without burning your paint. If you're brand new to this, don't worry — we'll point you to a beginner-friendly setup that makes the whole process forgiving.
What Are Swirl Marks, Really?
Swirl marks are thousands of very fine scratches in your clear coat. Individually they're too small to notice. But when direct light hits them, each tiny scratch reflects light in a different direction, and your eye reads the combined effect as a hazy, circular, "spider-web" pattern radiating out from the light source.
Here's the important part: swirls live in the clear coat, which is the transparent protective layer on top of your paint's color. Because they're shallow surface defects, they can be removed by gently leveling a microscopic amount of clear coat down to the bottom of the scratch. That's what polishing does. No wax, sealant, or "scratch pen" can do this — those only fill or mask.
What Causes Swirl Marks
Swirls are almost always self-inflicted through bad wash technique. The usual suspects:
- Automatic car washes — those spinning brushes are the number-one swirl factory. Grit from the last hundred cars gets dragged across your paint.
- Dirty or dropped wash media — a mitt or towel that touched the ground picks up sand and grinds it in.
- Single-bucket washing — rinsing your mitt in the same soapy water reloads it with the dirt you just removed.
- Wiping a dry or dusty car — "dry dusting" with a towel is pure sandpaper.
- Cheap, low-lubricity soap that doesn't let grit glide off safely.
The takeaway: swirls come from dragging tiny abrasive particles across paint. Fix the technique and you stop making new ones — more on prevention at the end.
Swirls vs. Holograms vs. RIDS: Know What You're Fighting
Before you touch the paint, identify the defect. Correcting each one is slightly different, and misdiagnosing leads to wasted effort. The fastest way to see them is with a strong LED light in the shade — swirls hide in soft or overcast light and jump out under a focused beam.
| Defect | What It Looks Like | Cause | The Fix |
|---|---|---|---|
| Swirl marks | Random, circular spider-web pattern around light | Poor wash technique, automatic washes | Single-stage machine polish (often enough) |
| Holograms | Straight-line, uniform, "buffer trail" streaks | Improper rotary/machine work by a prior detailer | Refining polish with a DA to remove marring |
| RIDS (Random Isolated Deep Scratches) | Individual sharp lines you can catch with a fingernail | Keys, branches, careless contact | Often too deep to fully remove safely — improve, don't chase |
The fingernail test: lightly drag a fingernail across the scratch. If your nail catches, the defect is through the clear coat and into deeper layers — that's a RIDS, and you should not try to grind it flat. You'll run out of clear coat first. If your nail glides right over it, it's a shallow swirl and it will polish out cleanly. Holograms are the giveaway that someone before you used a machine badly; a proper DA polish erases them.
Can You Remove Swirl Marks by Hand?
This is the honest part a lot of product pages won't tell you. You cannot truly remove swirl marks by hand. Rubbing compound with a foam applicator by hand generates nowhere near the consistent motion, pressure, and speed needed to level clear coat evenly. What hand-application does is deposit fillers and oils that temporarily hide swirls for a wash or two, after which they reappear.
Hand polishing has a place — a single deep scratch, a tight mirror housing, a spot repair. But for correcting swirls across whole panels, the only reliable fix is a dual-action (DA) machine polisher. A DA both spins and oscillates, which keeps the pad from heating one spot too long, evenly refines the clear coat, and produces results that hold up because the defect is genuinely gone — not filled. If you're serious about a swirl-free finish, budget for a machine. It's the difference between a fix that lasts years and a cover-up that lasts a week.
The Fix: Machine Polishing Step by Step
Paint correction is really just controlled clear-coat removal. Do it methodically and it's very safe. Rush it and you can burn through. Here's the workflow we use, scaled for a first-timer.
1. Wash and Decontaminate First
Never polish a dirty car — you'll grind leftover grit right back in and make things worse. Do a proper two-bucket wash with a high-lubricity soap, then clay the paint to pull out bonded contamination. Starting on a truly clean surface is non-negotiable.
2. Do a Test Spot
Pick an inconspicuous panel (a lower door, for example) and correct just one small 2x2 ft section first. This tells you whether your compound and pad combo is removing the swirls and how many passes it takes before you commit to the whole car. Every paint is different in hardness; the test spot is how the pros calibrate.
3. Single-Stage vs. Two-Stage Correction
How aggressive you need to be depends on how bad the swirls are:
- Single-stage (compound only): For light to moderate swirls, one pass with a cutting compound on a foam cutting pad often removes the defects and leaves an acceptable finish. Most daily-driver swirl jobs land here.
- Two-stage (compound then polish/glaze): For heavier swirls or dark, unforgiving colors (black, deep blue) where you want a flawless, glassy finish, follow the cutting step with a finishing pass. The first step removes the defect; the second refines out any micro-marring the compound left and maximizes gloss.
Our recommended value system covers both. The Golden State 4-1 Fast Cutting Compound does the heavy lifting of erasing swirls, and the Golden State High Gloss Glaze Compound (16 oz) follows up to bring out a deep, wet-looking shine on darker paint. Run them on Golden State Pads — the 5-inch for open panels, and a smaller pad for mirrors, pillars, and tight spots.
4. Correct the Panel
Prime the pad with 4–5 pea-sized dots of compound. Spread it at low speed with the machine off the trigger first (so it doesn't sling everywhere), then work a small section — about 2x2 ft — at a time:
- Keep the pad flat to the paint. Tilting concentrates pressure on an edge and cuts unevenly.
- Move slowly — roughly one inch per second — in overlapping passes, crosshatching horizontally then vertically.
- Let the machine's weight do the work. Use light, even pressure; don't lean on it.
- Work until the compound goes clear/translucent, then wipe the residue with a clean microfiber and inspect with your light.
5. Wipe Down and Verify With IPA
Compounds contain oils and fillers that can temporarily mask remaining defects — the same trick that fools hand polishers. To see your true result, wipe the panel with an IPA (isopropyl alcohol) solution — nitrile gloves and a ventilated space are sensible here, since IPA dries out skin and the vapour is flammable. This strips the oils so you can confirm the swirls are actually gone before you move on or seal the paint. If they reappear, do another pass. This single step separates real correction from a temporary cover-up.
6. Protect the Fresh Paint
Correction removes all existing wax and sealant, leaving bare clear coat exposed. Lock in your work immediately with a wax, sealant, or ceramic coating. If you want maximum longevity and gloss, this is the ideal moment to apply a coating — see our 2026 ceramic coating comparison for options.
The Right Machine for Beginners
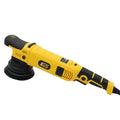
The machine matters more than almost anything else for a first-timer, because the wrong tool makes it easy to create holograms or burn an edge. For someone tackling swirls for the first time, we consistently recommend the Golden State DA Polisher — 15mm Throw, 1000W, 5-inch Backing Plate.
Here's why the 15mm short throw is the beginner-friendly pick: a shorter throw means the pad oscillates in a tighter orbit, which gives you more control and makes the machine far more forgiving around edges, body lines, and curved panels — exactly the areas where beginners burn through. It's easier to keep flat and predictable. And at 1000W, it still has more than enough power to cut swirls with the 4-1 compound; you're not giving up correcting ability for that control. It's the sweet spot for learning without wrecking a panel.
If you're detailing a large SUV or truck with lots of big flat panels and you already have machine experience, the longer 21mm throw covers ground faster — we break down that trade-off in our dedicated beginner's starter guide and the throw-comparison post in this series. But for a first swirl-correction job, start with the 15mm. Control beats speed every time when you're learning.
We also stock premium options — the Rupes line (LH19, Nano iBrid, HLR75) and Max Shine machines (M8S V2, and the MB8/MB15/MB21 brushless series) — for detailers who want the top shelf. They're excellent tools. But for the enthusiast fixing their own daily driver, the Golden State 15mm delivers the results without the premium price, which is why it's our value hero. Browse the full lineup in the DA polishers collection.
Beginner Safety Rules (Read These Twice)
- Always do a test spot first. Never commit to the whole car until you've proven your process on one small section.
- Keep the pad flat. Tilting the machine concentrates heat and cut on one edge — the fastest way to burn through.
- Stay off edges and high points. Clear coat is thinnest on ridges, door edges, and body-line peaks. Avoid running the pad's full pressure over them, or tape them off.
- Work in the shade, on cool paint. Direct Florida sun bakes compound onto the surface, makes it flash too fast, and makes burn-through far more likely.
- Don't chase RIDS. If your fingernail catches a scratch, it's likely too deep to remove safely. Improve it and move on — you can't win by grinding away all your clear coat.
- Use the right pad size. Big pad for big panels, small pad for tight areas. Fighting a 5-inch pad around a mirror leads to slips and mistakes.
Preventing Swirls So You Never Do This Again
Correcting swirls is satisfying, but the goal is to correct once and then keep the paint clean. Since virtually all swirls come from wash technique, prevention is straightforward:
- Ditch automatic car washes. The touchless-then-hand approach beats any brush tunnel.
- Use the two-bucket method — one bucket for clean soapy water, one for rinsing your mitt — with grit guards in the bottom so debris stays down.
- Wash with a proper, high-lubricity soap. Good soap encapsulates grit so it slides off instead of scratching. Start with our picks in the best car wash soap guide.
- Never dry-wipe. If it's dusty, rinse first. Always dry with a clean, plush microfiber or a drying towel, not a random rag.
- Protect the paint. A ceramic coating or sealant makes the surface slicker and easier to wash safely, reducing the odds of new swirls.
Do those things and the swirl-free finish you just worked for will last. And while you're upgrading your process, a quality wheel and tire routine keeps the whole car looking corrected — see our guides on the best wheel cleaner for brake dust to round out the wash.
The Bottom Line
Swirl marks look intimidating, but they're shallow clear-coat defects that a dual-action polisher removes permanently. Skip the bottled "swirl removers" that only hide the problem. Diagnose your defect, wash and decontaminate, do a test spot, correct with a real machine, verify with an IPA wipe-down, and seal your work. For a first-timer, the Golden State 15mm DA polisher paired with the 4-1 Fast Cutting Compound and High Gloss Glaze is the forgiving, effective, value-driven system that gets you a swirl-free finish without risking your paint.
Ready to fix your paint the right way? Explore the full DA polishers collection and grab the Golden State system that matches your ride.
Frequently Asked Questions
Can you remove swirl marks from car paint by hand?
Not truly. Hand application of compound can temporarily fill and mask swirls with oils, but it can't level the clear coat evenly enough to remove them permanently. Within a wash or two they reappear. The only reliable fix is a dual-action machine polisher, which refines the clear coat consistently so the defects are genuinely gone.
What's the difference between swirl marks and holograms?
Swirls are random, circular spider-web scratches from poor wash technique. Holograms are straight-line, uniform 'buffer trail' streaks left by improper machine work, usually a rotary in inexperienced hands. Both are shallow clear-coat defects that a proper dual-action polish removes.
Will polishing damage my clear coat?
Polishing removes a microscopic amount of clear coat by design — that's how it levels swirls. Done correctly with a test spot, a flat pad, light pressure, and by avoiding edges, it's very safe and leaves plenty of clear coat. The risks come from tilting the pad, working in the sun, or chasing deep scratches too aggressively.
What machine should a beginner use to remove swirls?
A dual-action (DA) polisher, and specifically a short-throw model for control. We recommend the Golden State DA Polisher with a 15mm throw and 1000W motor. The short throw makes it forgiving around edges and body lines while still having the power to cut swirls, making it the ideal first machine.
How do I know if a scratch is too deep to remove?
Use the fingernail test. Lightly drag a fingernail across the scratch; if your nail catches, it's a Random Isolated Deep Scratch (RIDS) that's gone through the clear coat and likely can't be fully removed without grinding away too much clear. If your nail glides over it, it's a shallow swirl that will polish out.
Why do my swirl marks come back after washing?
If they come back, they were never removed — they were filled with the oils in a compound, glaze, or 'swirl remover' product. Always do an IPA (isopropyl alcohol) wipe-down after polishing to strip those oils and confirm the swirls are truly gone before you seal the paint. If they reappear under the IPA wipe, do another correction pass.
Fix Your Swirls the Right Way
Everything you need for permanent paint correction — beginner-friendly DA polishers, compounds, glazes, and pads.
Shop DA Polishers →