The 5-Step Weekend Wash That'll Make Your Neighbors Jealous.
The exact car wash process professionals use — broken down into 5 foolproof steps. Under 90 minutes. Less than $5. Results that put automatic car washes to shame.


Your weekend wash shouldn't feel like a chore — it should be a ritual. The kind that leaves your car looking so good the neighbors slow down on their way to the mailbox. The kind where you catch yourself glancing back over your shoulder as you walk to the front door.
Here's the thing most people get wrong: they think a great car wash requires professional equipment, expensive products, and hours of free time. It doesn't. What it requires is the right process — the same five steps that professional detailers have been using for decades, adapted for your driveway and your Saturday morning.
This guide walks you through the exact process our team uses, step by step, product by product. Whether you're a first-timer or someone looking to level up from the hose-and-dish-soap approach, you'll walk away knowing how to deliver showroom-quality results for less than the cost of a drive-through wash.
Why Your Current Car Wash Is Probably Ruining Your Paint
Let's start with an uncomfortable truth: if you're washing your car with a single bucket, a sponge, and whatever soap is under the kitchen sink, you're grinding micro-scratches into your clear coat every single time. Those swirl marks you notice in direct sunlight? That's accumulated damage from improper washing — not from road debris or age.
Automatic car washes aren't much better. The brushes in tunnel washes drag contaminants from every vehicle that passed through before yours across your paint. Even "touchless" automatic washes rely on harsh chemicals at high concentrations to compensate for the lack of physical contact, which strips wax, sealants, and ceramic coatings over time.
The two-bucket method exists specifically to solve this problem. By separating your dirty rinse water from your clean soap water, you ensure that every pass of the mitt across your paint is loaded with clean soap — not last panel's dirt. It's the single most impactful technique you can adopt, and it adds less than five minutes to your total wash time.

What You'll Need Before You Start
Gathering your supplies before turning on the water will save you from dripping soap all over hot panels while you hunt for a towel. Here's the complete supply list for a pro-level weekend wash:
Essential equipment: Two 5-gallon buckets with grit guards, a quality wash mitt (lamb's wool or microfiber chenille), a wheel brush with soft bristles, 2–3 waffle-weave drying towels, a foam applicator pad for tire dressing, a pressure washer or hose with an adjustable nozzle, and a spray bottle for diluting products.
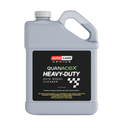
Products for each step: Quan Pink concentrated car soap, Quan Brown acid-free wheel cleaner, Quan Lustre detailer spray, Quan Blue tire shine, and Quan Finish for trim dressing. Keep Quan AcidX on hand for stubborn wheel deposits.
Step 1 — The Pre-Rinse Knockdown
Every professional detail starts the same way — with water, not soap. Blast the entire car from top to bottom with a pressure washer (1,500–2,000 PSI with a 40-degree fan tip) or a strong hose nozzle. You're removing loose dirt, pollen, bird droppings, and road grime so that none of it gets dragged across the paint during the contact wash.
Pay special attention to the areas where contaminants accumulate most: wheel wells, lower rocker panels, behind side mirrors, around emblems, and the leading edges of the hood and bumper. These zones collect the heaviest buildup and are the most likely to cause scratches if you skip the rinse.

Step 2 — Two-Bucket Contact Wash
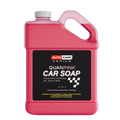
Bucket 1: Quan Pink — mix 5 oz with 5 gallons of water, with a grit guard at the bottom. Bucket 2: Clean rinse water with its own grit guard. This is the bucket where you'll scrub your mitt clean between panels.
Work one panel at a time, starting from the roof and working down. The logic is simple: gravity pulls the dirtiest water to the lowest panels, so you want to wash the cleanest surfaces first. After each panel, dunk your mitt into the rinse bucket, scrub it against the grit guard to release trapped particles, squeeze it out, then reload with fresh soap from Bucket 1.
Use straight, overlapping passes — never circular motions. Circles concentrate pressure on small areas and create the classic swirl-mark pattern. Straight lines distribute pressure evenly and are far easier to correct if a micro-scratch does occur, since linear marks are less visible than curved ones.
pH-neutral, hyper-concentrated formula. Mix 5 oz with 5 gallons of water. Dense foam lifts dirt and road grime fast while staying gentle on exterior surfaces. Rinses clean for a spot-free, streak-free shine. Starting at $15.00/32oz.
Shop Now →Step 3 — Wheels & Tires
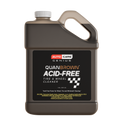
Wheels are the dirtiest part of any vehicle and require their own dedicated step and products. Spray Quan Brown diluted 4:1 (4 parts water to 1 part product) onto cool wheel faces. Let it dwell for 30–60 seconds — you'll see the formula react with ferrous brake dust and turn purple, which is the iron-dissolving chemistry at work. This color change is your visual confirmation that embedded contaminants are being broken down at the molecular level.
Agitate each wheel with a dedicated wheel brush, working into every lug nut hole, behind each spoke, and along the barrel if your wheel design allows access. For the tire sidewalls, a stiffer brush works well to lift embedded brown road grime from the rubber's textured surface.
For stubborn deposits that don't release with Quan Brown alone — common on vehicles with performance brake pads or those that haven't been cleaned in a while — follow up with a light spray of Quan AcidX diluted 1:10 with water for brake dust and road grime, or 1:5 for heavy oxidation. Rinse it off within 60 seconds and never let it dry on the wheel surface.
Step 4 — Rinse & Dry
Here's a technique most beginners miss: the sheeting rinse. Remove the nozzle from your hose entirely and let water flood each panel in a smooth, unbroken sheet. The lack of pressure creates surface tension that causes the water to carry itself off the panel in wide sheets rather than clinging in droplets. This significantly reduces the amount of standing water you need to towel off and cuts your drying time in half.
Dry immediately with a clean, high-quality waffle-weave microfiber towel. Never let the car air-dry — mineral deposits in tap water will leave water spots that bond to your clear coat within minutes, especially in direct sunlight or warm weather.
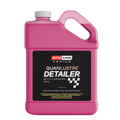
As you dry, mist Quan Lustre onto your towel (not directly onto the paint) and use it as a drying aid. The carnauba wax content provides lubrication that prevents the towel from dragging, while simultaneously depositing a thin layer of gloss-enhancing wax. This one product turns the tedious drying step into a value-add that leaves your paint slick and reflective.

Step 5 — Dress & Protect
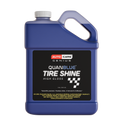
This is the step that separates a "clean car" from a "detailed car." Apply Quan Blue to clean, dry tire sidewalls using a foam applicator pad. One even coat gives you a natural satin finish; two coats deliver that deep, wet-look gloss that makes tires look brand new. Wipe any overspray off the wheel face immediately.
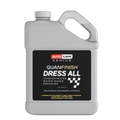
For exterior plastic and rubber trim — including fender flares, mirror housings, bumper trim, and window seals — apply Quan Finish diluted 50/50 with water onto a microfiber applicator for a natural gloss, or use full strength for higher shine. This water-based dressing provides UV-resistant protection that prevents fading and cracking, while delivering a consistent satin sheen that matches your freshly washed paint.
Step back. Take a look. That's a car that looks like it just rolled out of a professional detail bay — and you did it yourself, in your driveway, for less than the price of a coffee.
Cost Breakdown: DIY vs. Drive-Through
One of the most common objections to hand washing at home is that it's "not worth the time." Let's put actual numbers on it:
| Product | Per-Wash Cost |
|---|---|
| Quan Pink Car Soap | $0.42 |
| Quan Brown Wheel Cleaner | $0.85 |
| Quan Lustre Drying Aid | $0.60 |
| Quan Blue Tire Shine | $0.50 |
| Quan Finish Trim Dressing | $0.35 |
| Water (avg. municipal rate) | $0.15 |
| Total Per Wash | $2.87 |
Compare that to the $15–25 you'd spend at a basic drive-through car wash, or $35–60 for a hand-wash detail, and the math speaks for itself. Over 52 weeks, you'd save anywhere from $630 to $2,960 per year while getting dramatically better results and zero risk of automated-brush scratches.
Common Mistakes That Destroy Your Finish
Even with the right products and the right process, a few common errors can undermine your results. Here are the ones we see most often.
Washing in Direct Sunlight
When soap or water dries on a hot panel before you can rinse it, the minerals and chemicals concentrate and bond to the surface, creating water spots that may require a clay bar or light polish to remove. Always wash in the shade, or time your wash for early morning or late afternoon.
Using Dish Soap
Dish soap is formulated to strip grease — which means it also strips wax, sealants, and ceramic coatings. A single wash with dish soap can undo months of paint protection. Use a pH-neutral car-specific soap like Quan Pink that cleans effectively without stripping protection.
Drying with a Bath Towel
Regular cotton towels don't have the fiber density or softness to safely dry automotive paint. They drag across the surface and leave fine scratches. Invest in quality waffle-weave microfiber towels — they absorb far more water per pass and glide without friction.
Skipping the Wheels
Brake dust is a mixture of iron particles, carbon fibers, and adhesive compounds. Left uncleaned, it bakes onto your wheel finish and becomes progressively harder to remove. A weekly cleaning with a dedicated wheel cleaner prevents permanent staining and pitting.
Scrubbing in Circles
Circular motions create the distinctive swirl-mark pattern visible in direct sunlight. Always wash and dry in straight, overlapping lines that follow the length of each panel. Linear micro-scratches are less visible and easier to correct.
Your Weekend Wash Shopping List
Everything you need to execute the 5-step process, all from the Quan Collection:


Start Detailing Like a Genius.
Everything you need to run the 5-step pro wash — shipped free on orders over $75.
Shop the Weekend Wash Kit →